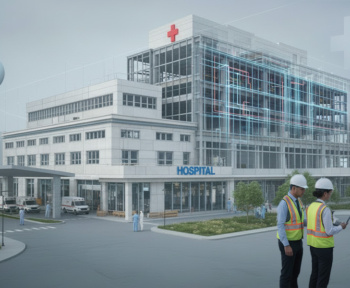
The construction industry faces a soaring renovation cost and several visualization challenges while preserving an as-built model. Point cloud modeling has emerged as a solution for contractors, surveyors, and construction professionals to get high-quality and resource-optimized restoration of built structures and renovation projects.
Point cloud technology captures rich and complete data of renovation and brownfield redevelopments through laser scanners. Point cloud to 3D BIM models give accurate and detailed information about the existing building conditions and aid in accurate and precise construction planning.
Compared with newly constructed work, the laser scan data assures the construction quality. With thorough use of laser scanned data in the construction project, the new facility will have as-built documentation, valuable for owners throughout the project life-cycle.
Point Cloud Project and Process to Import a Point Cloud File in Autodesk Revit and Recap
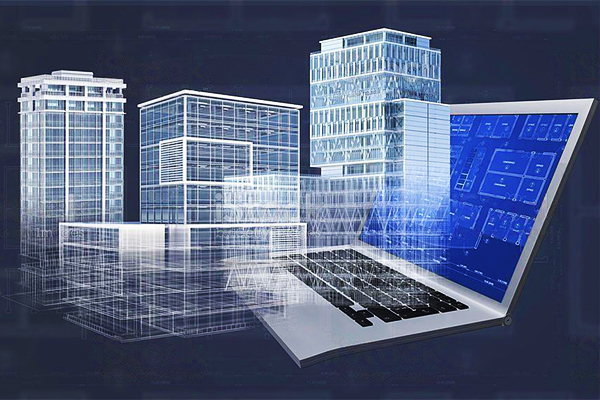
Point clouds are data sets representing objects or space. The points represent the X, Y, and Z coordinates of a single point on a sampled surface and collate many single spatial measurements into a dataset.
3D laser scanners and LiDAR technology are the technology used for generating point clouds. You can create a 3D model by rendering the data points into a 3D mesh. It helps combine and coordinate these points and sets a framework to export the point cloud files and then import them to a CAD or BIM system.
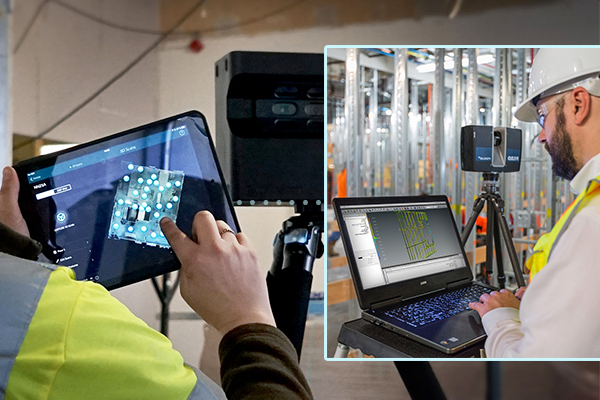
3D laser scanners usually scan a building or an environment in a spherical way, i.e., 360° Horizontal x 270° Vertical, covering 90 percent of a sphere. Autodesk’s Recap helps convert scan data to a point cloud format that can be viewed and edited in other products.
Point cloud files can be shared with multiple file formats such as “.e57, .xyz, .ply, etc.” and also data can be shared through HTML formats such as Matter port which does not require any software to view the data. Directly we can able to view and check the sizes online. When compared with online data and actual points cloud data contains much difference in terms of accuracy which includes “True view” which we can say camera location once we activate the camera location we are able to view realistic 360 images and can also measure the elements sizes.
Converting Point cloud machine data to a readable format we have to use Autodesk Recap software where we can import point cloud support files (.rcs) and then extract to point cloud project file(.rcp) which is a combination of all support files.
Before importing the point cloud to Revit, you can delete point clouds not required for modeling in Revit and can hinder the computing power. With Recap software, you can handle issues such as point cloud density, color, scale, and units.
After making the necessary changes, save the point cloud files in Autodesk Recap so that the latest version of Revit can recognize them, i.e., the files with RCP or RCS extensions. Next, to insert the file in Revit, run the point cloud command on the insert tab of Revit.
Now we are good to import the point cloud to Revit, Steps to Start a Point Cloud using Autodesk Revit and Autodesk Recap
Here are a few easy steps that you can refer to kick start your point cloud project using Autodesk Revit and Autodesk Recap.
1. Linking and setting coordinates for Recap file into Revit
The first step is to index the point cloud file into the Revit project. An RCP point cloud file format contains multiple RCS scan files.
- Open the Revit Project.
- Click Insert tab > link panel > Point Cloud.
- Specify the files or files to link, navigate to the location of files, and select file types, i.e., point cloud projects(.rcp), point clouds(.rcs), raw formats, or all files.
- Name the file
You can follow these steps for positioning.
- Select Auto-Center to Center – Revit places the center of the point cloud bounding box at the center of the bounding box of the model.
- Auto-Origin to Origin – Revit places the point’s cloud origin (0,0,0) at the Revit project origin.
- Auto-By shared coordinates – Revit assumes that the coordinates in the point cloud file are specified in the shared coordinate system in the model.
After positioning, click Open to link the current version of the point cloud to the project. Then, click Start indexing. After the indexing process is complete, click Close.
2. Create Levels as per the levels of the Scan
After inserting the point cloud in Revit, you create levels according to scan levels.
- Go to Elevation view. You will see the level1 and level2 (by default) set by Revit.
- Click the section tab and create different sections of the point cloud, if required.
- Go to the Architecture tab and click levels on the ribbon to set new levels along with the dimension, as required.
- Then, click on the level and rename the levels.
3. Create Floor Plans
Click on the tile tool in the view tab to see the floor plan and 3D view of the point cloud simultaneously.
You can apply shape recognition technology to the point cloud data, and Revit can detect planes to the current view. It allows you to snap the plane and accurately create walls.
- Go to Architectural floor to create the floor plans and select the pick walls tool.
- Select the level you want to change or modify.
- Click on the walls you want to select. And choose the finish button and put it on the 3D model.
4. Identify the Service Which We Want to Model
Revit can detect geometry from the point cloud and allow you to add building elements such as doors, windows, etc.
For example, you can add windows on a façade section view. To see the window opening in the shaded view, enable the Ghost Surfaces graphic display option.
Use the measure between two references tool to determine the correct window size. Select the window type and place windows using point cloud as a reference.
5. Match the Size of the Service in Plan and Elevation
If you want to add doors, you can go to interior point cloud data and measure them, or you can use the Lgs file. You can open the file, explore around the cloud, and take measurements of things you want to add to the plan, such as doors or windows.
Go inside the Revit, click on doors and then edit and upload or import the type of doors you want. Then go to the plan and drop the doors according to the measurement.
6. Create Families Wherever Required
To create families in Revit, such as doors, windows, ceilings, or walls, select the correct category or choose the best possible view for its creation.
You can import families from the library included in the installation of the Revit or from external sources, such as NBS, Revitcity, or BIM objects. Then, edit the family by changing its category and reloading it in the project. These procedures help you find the families where they should be while handling information.
Exposure of eLogicTech in Point Cloud Projects
eLogicTech has extensive exposure in handling point cloud projects for renovation, construction, remodeling, retrofitting, and re-engineering projects. Specialized in the point cloud to BIM modeling, Autodesk Revit, and Autodesk Recap, eLogicTech has delivered projects concerning to import of point cloud in Revit, creation of plan reviews, elevations, sections, duplication of views, family creation, and 3D modeling.